
Cylos Homestead Beginner Guide
Beginner's guide from Cylos to Homestead basics: gourds, prosperity, facilities, retainers, farming, and the Inn.
This page is a web version of Cylos guide available on Google Doc. It is kept in sync automatically.
Homestead Guide
Basics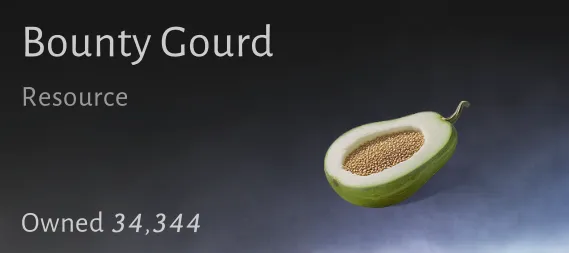
Bounty Gourd: The main currency you use for almost everything inside the Homestead system. You can buy consumables (seeds, artisan manuals etc.), facilities & furniture with it.

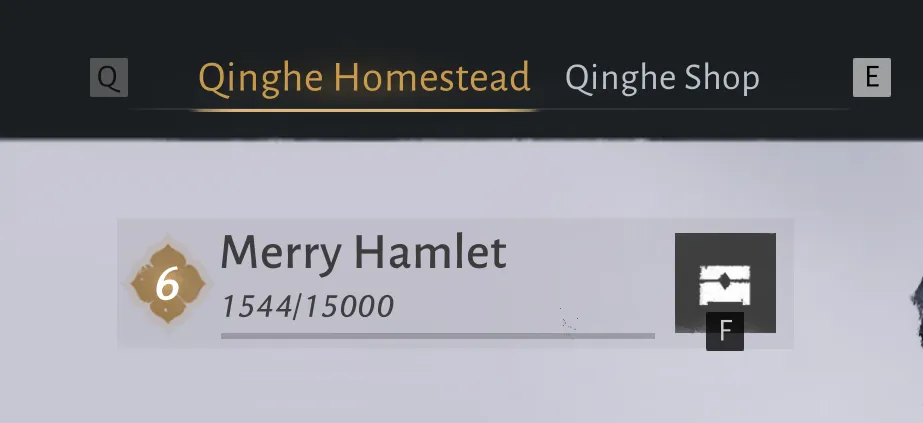
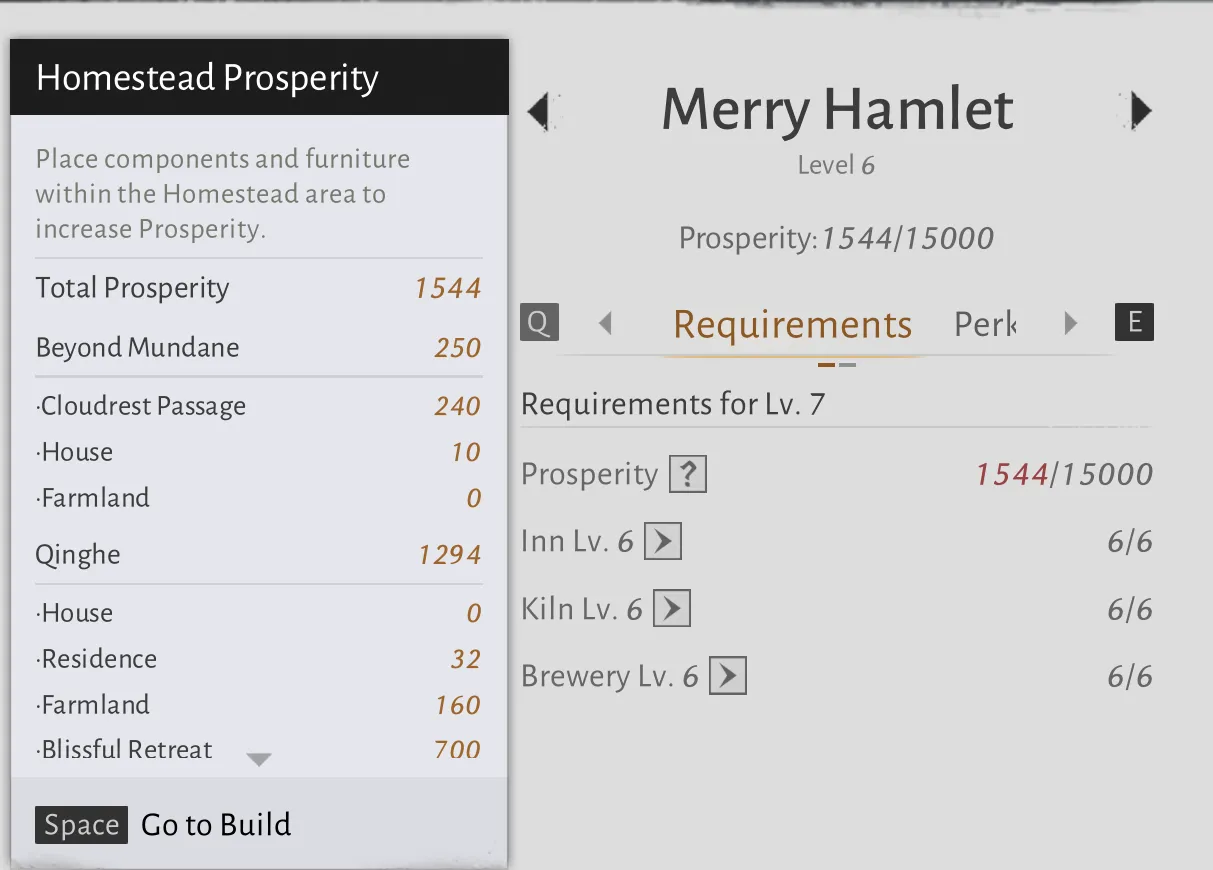
Prosperity: Prosperity could be seen as the “elegance score” of the Homestead. You gain prosperity points by placing furniture and facilities that have a prosperity score. The prosperity score is an accumulation of everything you placed inside Blissful Retreat, Beyond Mundane & any facility in Qinghe. You can check your score by clicking your Homestead level in the top right and then the small question mark next to “Prosperity”.

Warehouse: The warehouse is your Homesteads storage. All the items you produce go into your warehouse. You can also deposit items from your normal character backpack into the warehouse. There is a deposit cap of 1200 items per week. The best use for this feature early on would be to deposit items you can buy from normal vendors across the map to save time e.g. Dushan Blue Jade, Copper, Wine-Scented Jade etc. This could give you a boost in completing the Trade for Profit packs without having to change around your whole production line.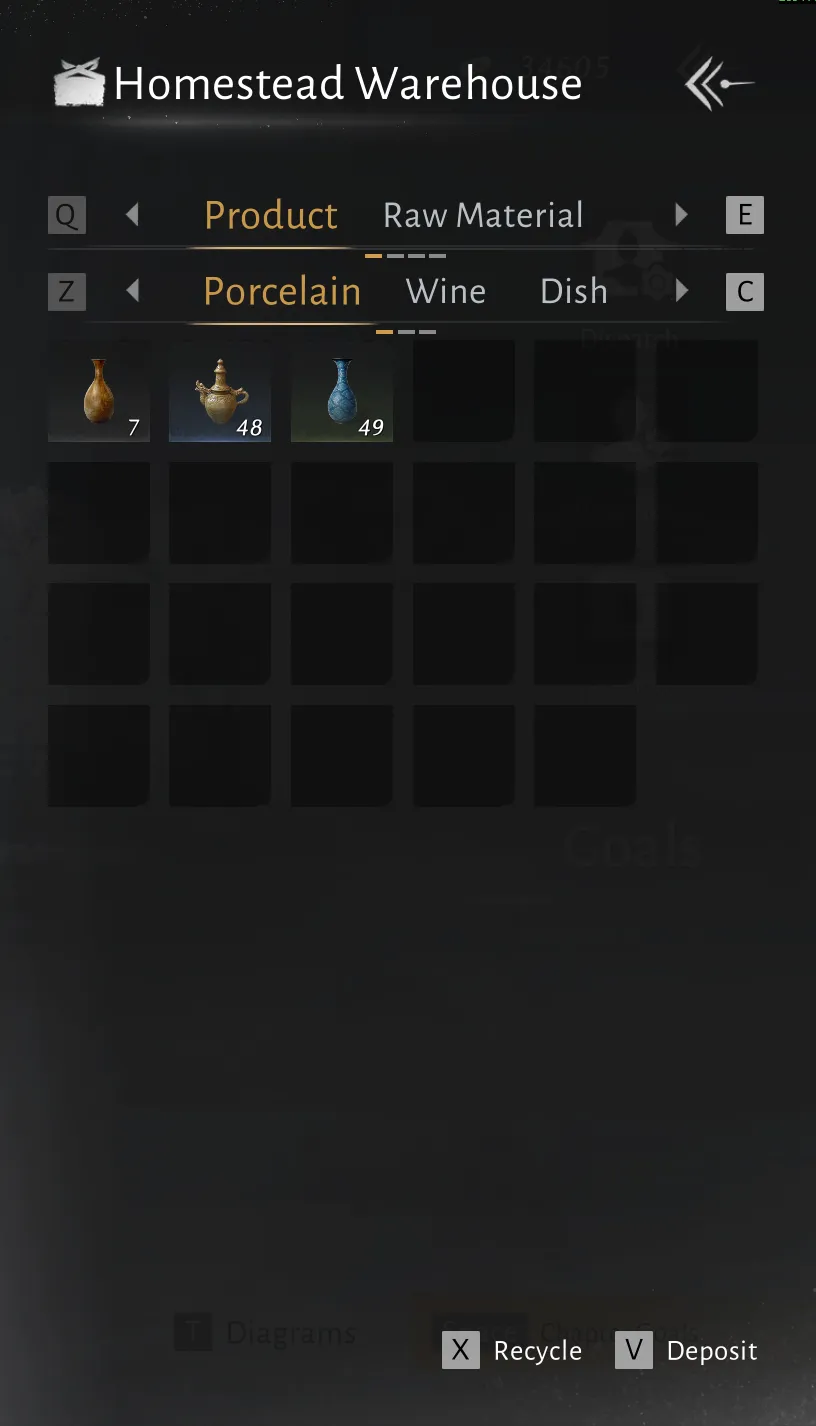
Facilities: Facility buildings refer to buildings you can use to place facilities e.g. stoves, furnaces, breweries & leisure facilities.
Currently there are the following Buildings available:
- The Inn: cooking and catering = gourds
- Porcelain Kiln: producing pots and flasks
- Aromas Brewery: producing drinks
- Crane Retreat: leisure to recover stamina for your retainers
You can either use the pre-build facilities like the Kiln & the Brewery that are already present in Qinghe or you can place your own Building somewhere else on the map. Each building has a maximum range around it that marks the area you can build in. They also have a maximum amount of facilities you can place in them depending on the level of the said building.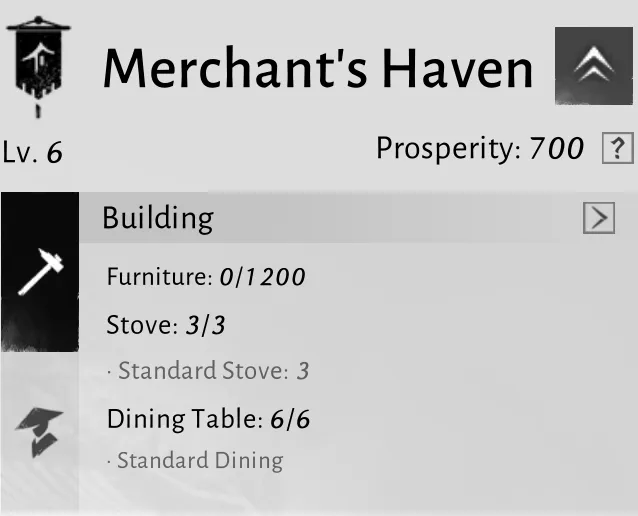
In this example the Inn is level 6 and you can place up to 3 stoves and 6 tables inside the area. It also has a maximum amount of furniture items that can be placed inside this zone. It should be noted that placing more than 1 building does not increase the amount of facilities you can place in total. The cap refers to all the buildings combined so e.g. 2 Inns ≠ 6 stoves it will still stay 3.
The Main UI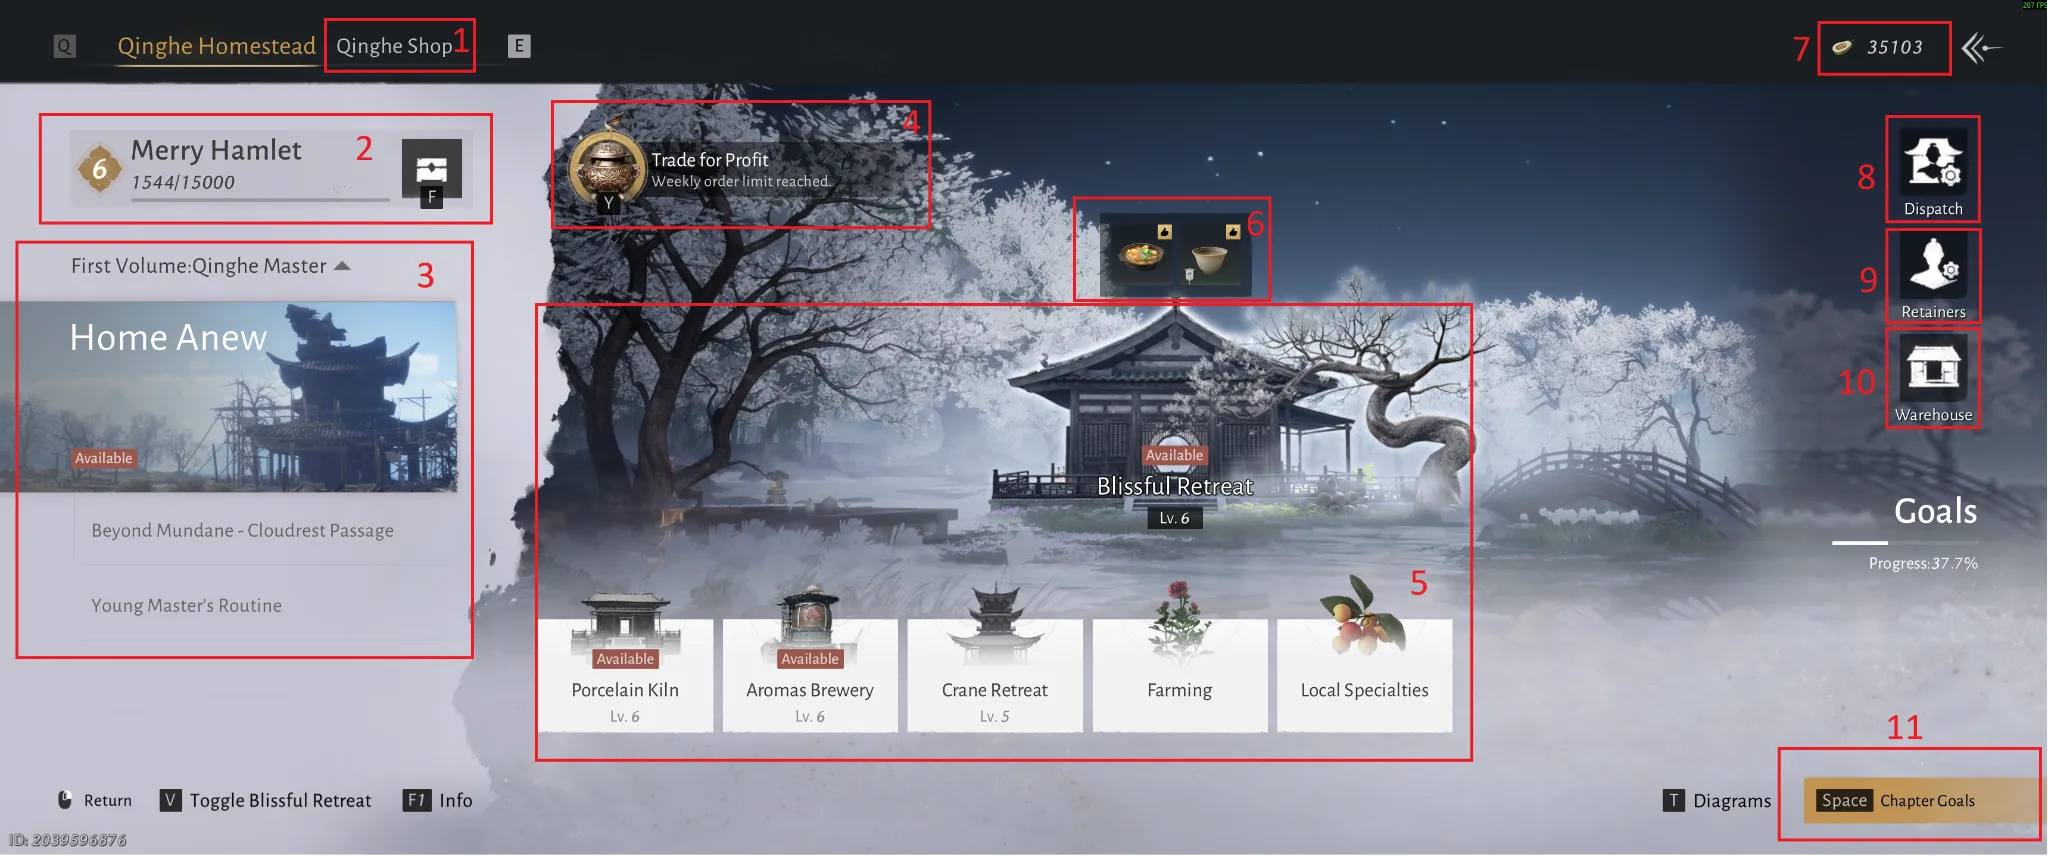
- 1) Qinghe Shop: Place to buy Appearances for Golden Grain & spend your Gourd for Furniture, Seed etc.
- 2) Homestead level: This shows your current Homestead level and the amount of total prosperity you have across your region.
- 3) Qinghe Master:
- Home Anew: The Main Homestead UI
- Beyond Mundane: Your own separate instance where you can build
- Young Master’s Routine: Minigame that you can do up to 3 times per week. Rewards you with useful resources for the homestead and sometimes gives you the option to recruit special workers.
- 4) Trade for Profit: Weekly delivery tasks that reward a lot of gourds.
- 5) Industries: Overview of your Industry levels and access to your farming plots and local specialties.
- 6) Weekly Best Sellers: Some time after every reset (game says 9am???) 1 Dish and 1 Wine from your current tier will be set as Best Sellers. They have their sales price increased by 20%. It is recommended to make both those items and sell them for the rest of the week for the highest profit. Unless you upgrade and have access to new dishes which might sell for more.
- 7) The amount of Bounty Gourds you own
- 8) Dispatch: This is your “factory” overview menu. Here you can assign workers to facilities without having to go to the place on the map.
- 9) Retainers: This is where you hire and manage your workers aka retainers.
- 10) Warehouse: The Warehouse is your homestead’s storage. It comes with the deposit feature.
- 11) Chapter Goals: Chapter Goals are your quests. Try to complete as many of these early on as you can since they reward a good amount of guards.
Farming
Farming is your main way of gathering resources for your cooking and brewing needs. You start out with 1 farmplot and can get up to 4 by progressing your homestead. There is no difference in yield or the crops you can plant between the 4 different plots. The only difference is the level you unlock the auto-farming feature for each one.
Basics: 
To start farming, place down the farm plot and walk up to it. You can interact with it by pressing F to enter Farm Mode. Inside farm mode you will be presented with this UI. Here you have all the features you need to start farming. To exit press F3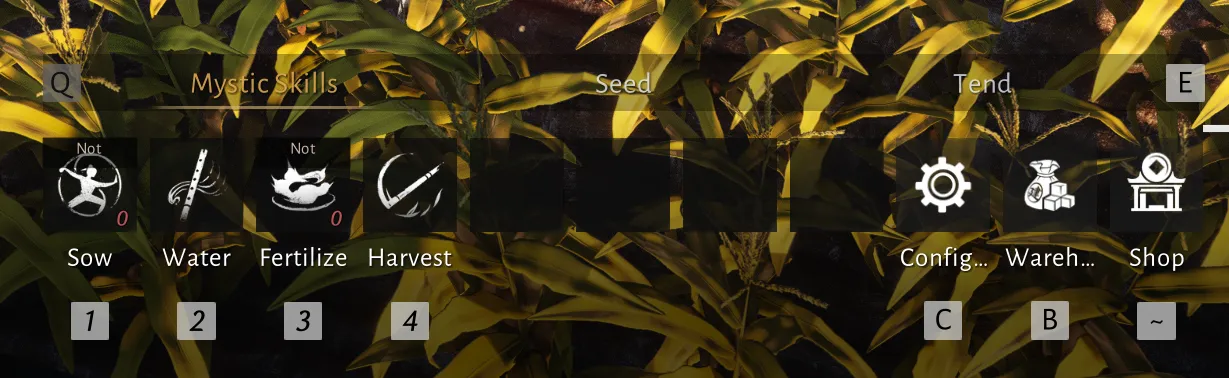
- 1) Sow: Used to plant seeds. To choose what seeds you want to plant either left click on the sow button or click on the config button on the right. This will pull up the Seeds menu. Here you can select the seed you want to be sown by ticking the box on the right side

One thing to note is that each plot has 16 slots. So you can choose either 16 of the same seed or 8/8 of 2 different seeds. Each seed has a different growth time and yield amount. Usually the more growth time means more yield. You can check this by hovering over the seed.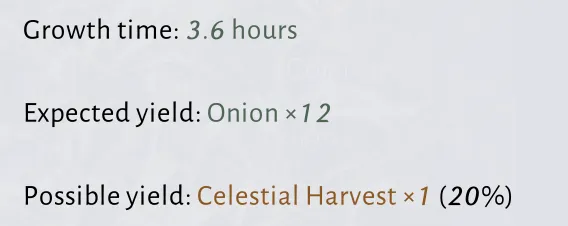
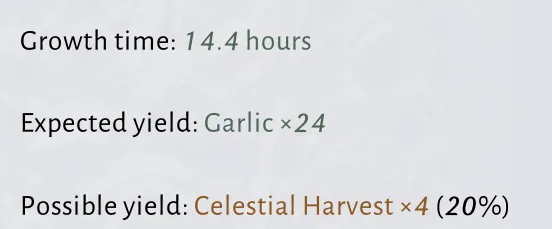
Alternatively you can also change the Tab to Seeds and plant them from there by pressing the number you want to sow.
- 2) Water: Watering increased the crop growth speed by 20%. This can be done once every 12h. It will deduct the 20% from the amount of time that is left the moment you cast watering.
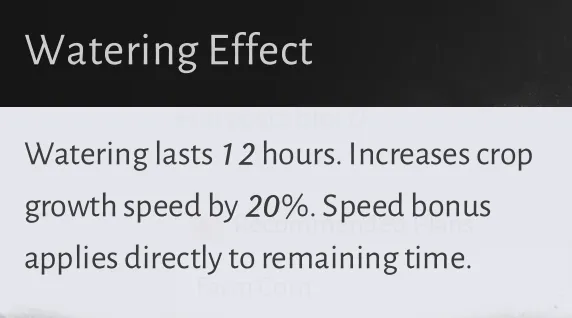
- 3) Fertilize: Fertilizing your crops gives them a 10% yield bonus. This lasts until harvest so you don’t have to worry about it running out. To add fertilizer click on Fertilizer or config and add the desired amount.
- 4) Harvest: This is how you harvest your finished crops. You can either use the harvest skill or simply hit the crops with your weapon to harvest them.
In the Tend Tab you will find the option to Remove crops. You can use this to delete unwanted crops you planted.
By going to the main homestead screen and pressing on Farming you will be presented with this UI. Here you can see all your farms and what you planted on them. 
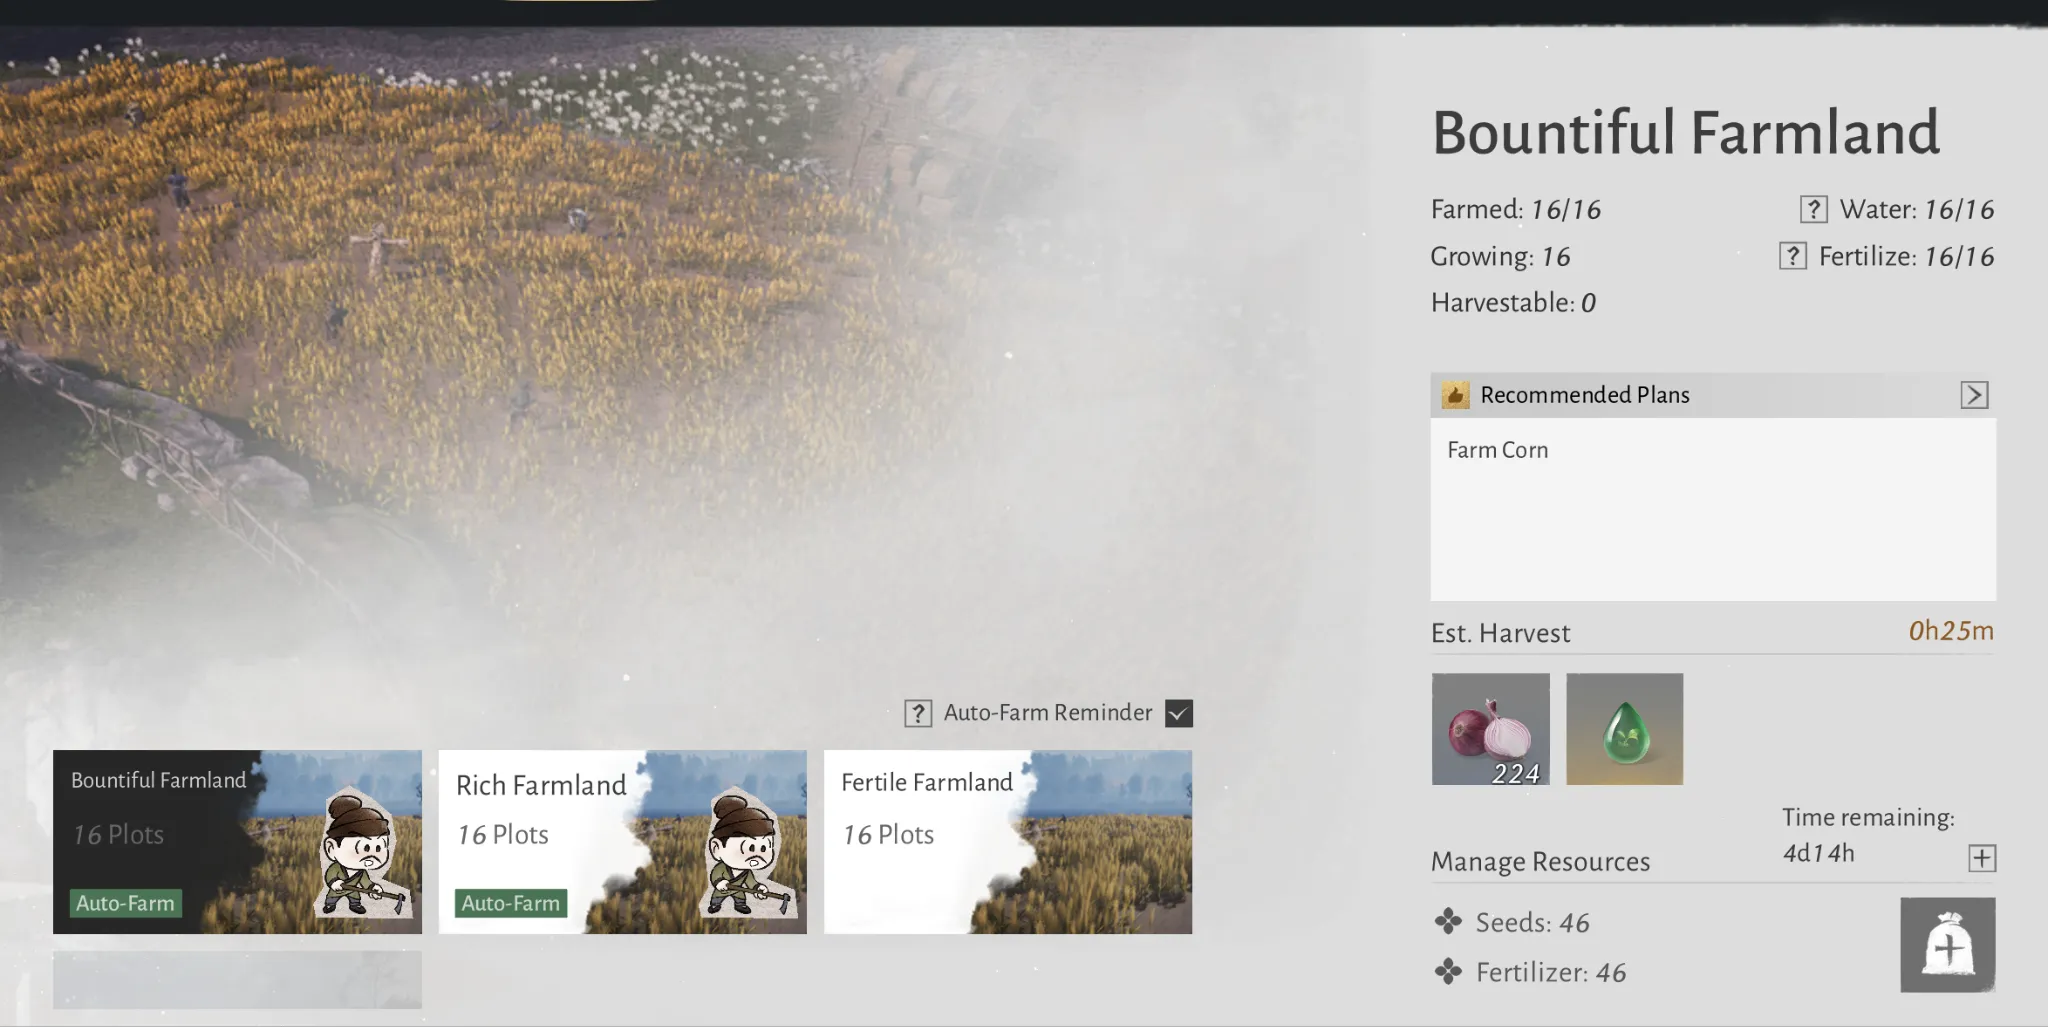
By pressing on a farm you can check:
-
How many crops are placed
-
If the crops are watered and fertilized
-
If the crops are still growing or harvestable
-
The recommended crop to grow
-
The amount of time left until harvest
-
Estimated yield
-
After you unlock the auto-farming feature you will also see the remaining time you have, how many seeds and fertilizer you have in queue. Auto-farming is indicated by the little man working on the specific plot.
Retainers
Retainers are your workforce. You use retainers inside your Inn, Porcelain Kiln, Aromas Brewery & Local Specialties. There is a maximum amount of retainers you can hire depending on what your current homestead level is. You can recruit more workers in the Retainer menu by clicking on recruit at the bottom right. This will pull up the recruitment menu. Different workers come with different innate skills. You can check the skills by clicking on the little face icon and looking for Innate or Unlearnable skills. In this example Zhang Hu comes with the Innate skills Mining & Chopping wood which means you can send him to work right away. Unlearnable means that he can not learn any of the listed professions. 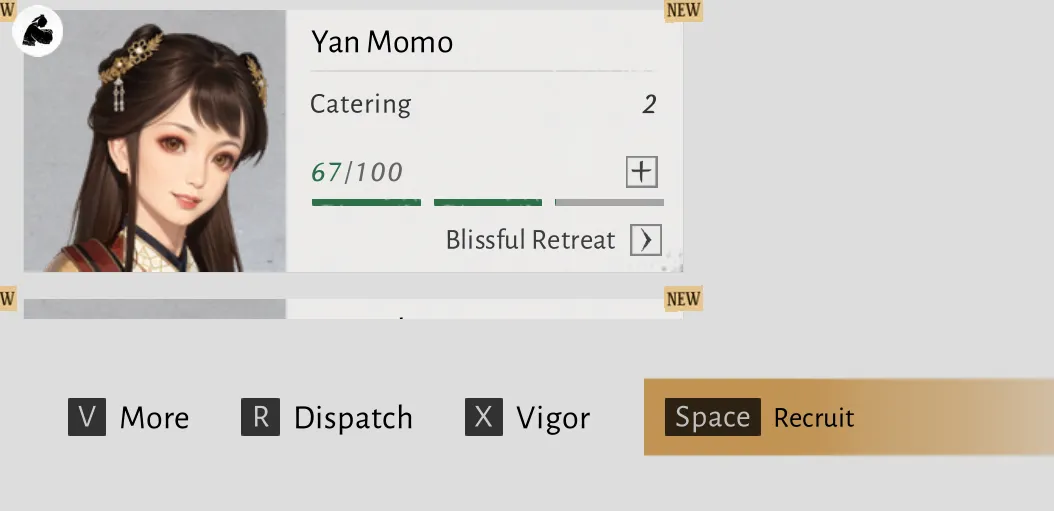
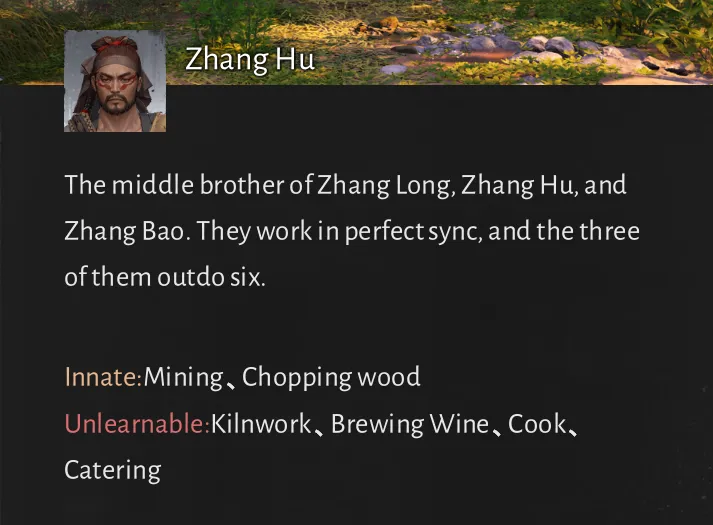

There are instances where the worker has no listed skills. This means they can learn any of the skills. The level of a retainer skill determines how fast he finishes a task or how many materials per hour he will produce. You use Artisan’s Manuals to increase the skill level.
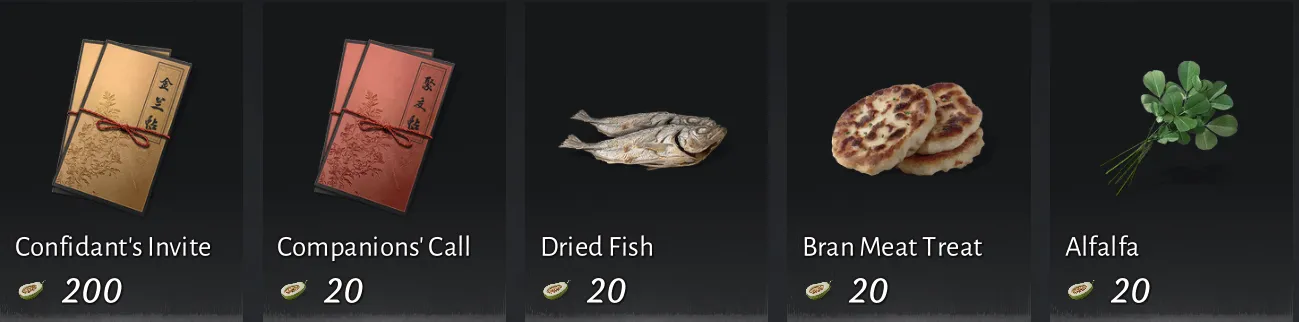
Recruiting Retainers: There are several different ways of recruiting retainers. First of all retainers are split into 2 categories: Confidants & Mortals. Confidants are special workers that you can only recruit during the Young Master’s Routine.You also need the yellow Confidants Invite to recruit them.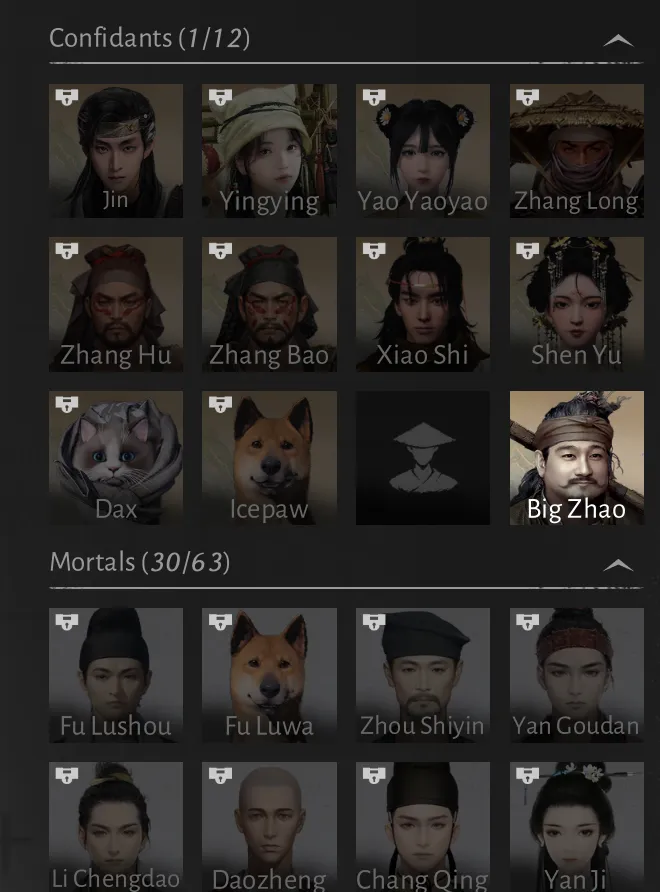
Then there are the Mortals. There are different requirements to recruit them. Some require you to give them the red Companion’s Call.
Some others simply need to be persuaded with GIft of Gab. Animal type workers usually need some form of food item you can buy in the Consumables store like Dried Fish or Alfalfa.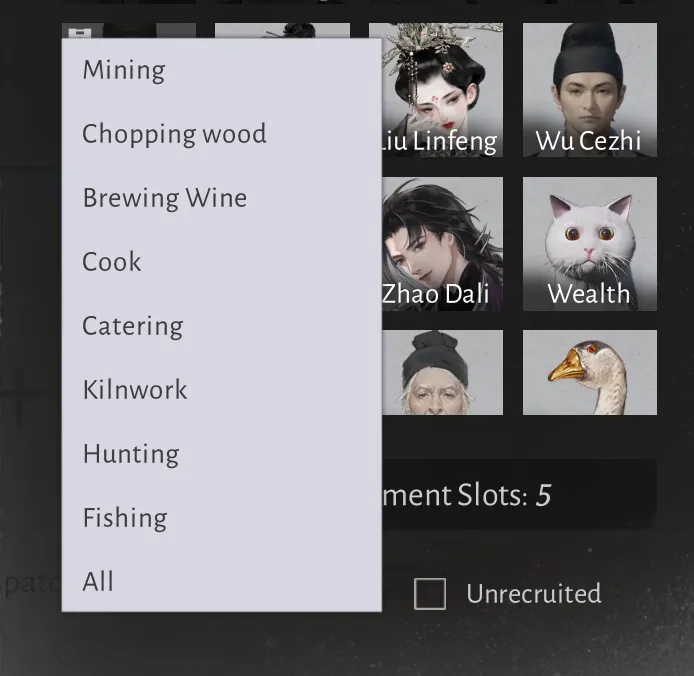
You can also filter for specific innate skills at the bottom of the retainer list. Workers with the filtered skill will show a small orange icon in their portrait to indicate that they have the skill.
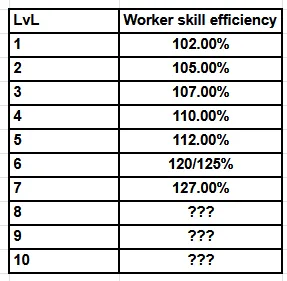
Retainer skills: As previously mentioned some retainers come with innate skills which does not mean that the retainer can’t learn other skills. These skills go from level 1 to 10 which is directly tied to the level of your homestead, and gain increased production efficiency as the level increases. As of right now (Homestead lvl 7) it seems that the first big breakpoint comes skill level 6 for all skills but Catering. At lvl 6 Retainers unlock a mystic skill that gives them extra 5% efficiency. Below you can see a breakdown of the level and efficiency. Putting all of this into consideration the most cost efficient level to push a worker to would be lvl 6 as it has the biggest increase out of all the levels. To increase the level of the skill you can either use Artisan’s Manuals or just wait as they gain passive XP by working.
The Inn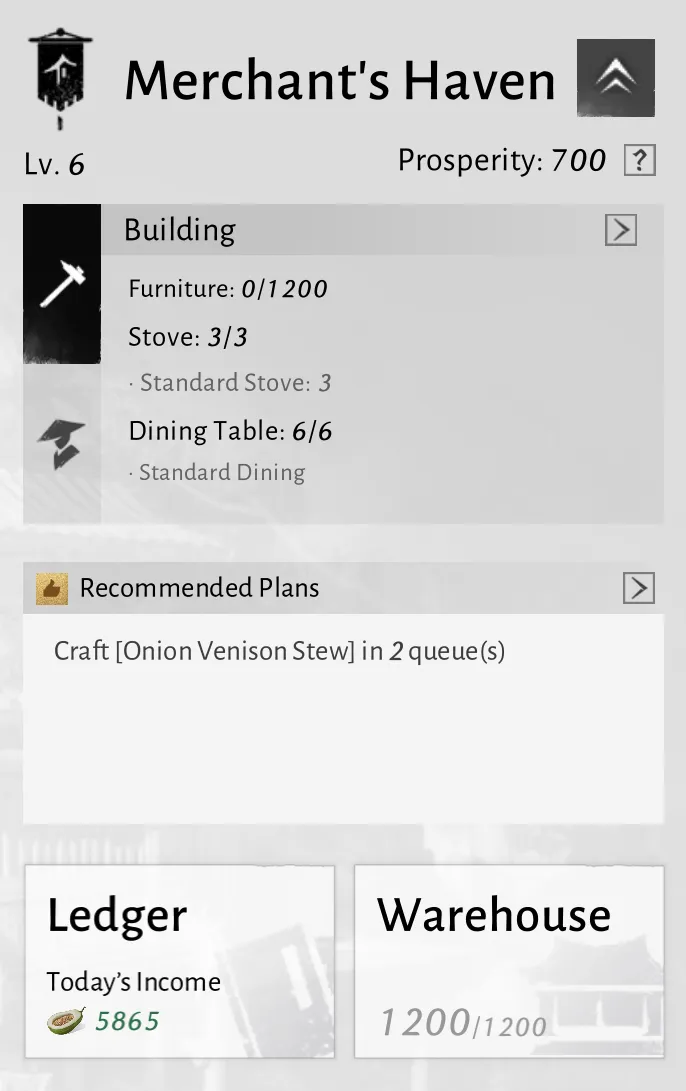
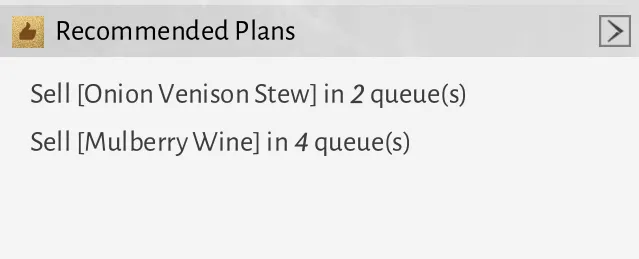
The Inn is a facility building and is where you make most of your Bounty Gourds. You do this by cooking dishes and then catering them. Depending on the level of your Inn you can place a varying amount of stoves and tables & it also determines the amount of retainers you can send fishing & hunting. Stoves determine the amount of cooks you can use and tables determine the amount of dishes/drinks you can sell. There is no difference in profit or productivity between basic and standard stoves/tables, you only get more prosperity for placing them and you do need to place them to be able to upgrade your Inn. You can tell how many furnaces/tables you can place by checking the Inn UI. It will also tell you how many retainers you can employ by clicking on the icon below the hammer. Furthermore, do you get a recommendation of what to cook for the most profit and an overview of how much income you have made today. It also shows your warehouse deposit cap. The same applies for catering. You get a recommended sales plan by selecting Cater. This will show you the setup for the most profit/ideal setup you can currently make. 
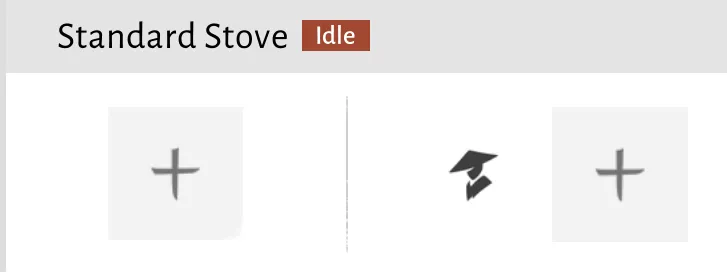
To start cooking click on the + icon on the left side to select the dish you want to make. Then click on the + on the right side to add the retainer.
Depending on what cooking level your retainer has it will take more or less time to finish the dish.
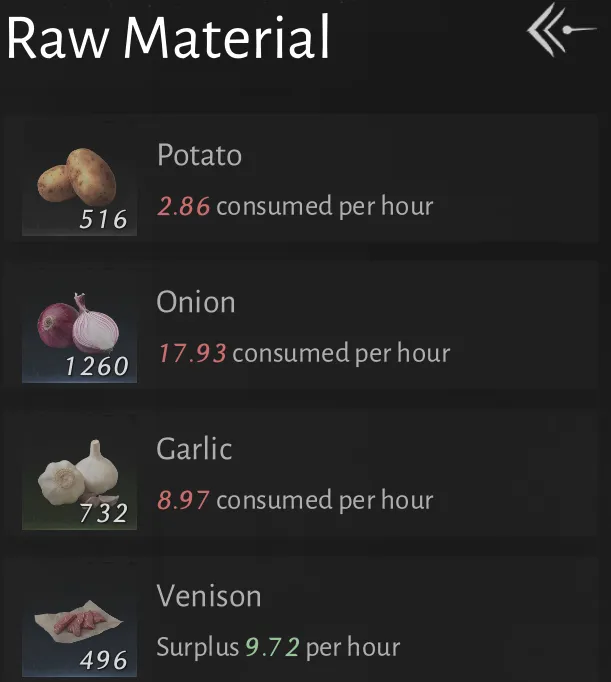
The recommended dishes are always marked with a little yellow thumbs up icon. On the top right you will find the Materials Abundant option. This will give you an overview of how many raw materials you use up per hour. This will also tell you if you have a surplus production on any of your materials. It does not account for anything that is currently planted on the farms and will only tell you the surplus for materials gained from Local Specialties. 
Catering is your way of selling the cooked food and drinks you make in your brewery. You can tell how many gourds you get by hovering over the dish. The Unit Sale Price is the amount of gourds you get every time your retainer finishes one work cycle. You can also check your production/consumption per hour to ensure you have enough supply to keep the sales running while you’re offline.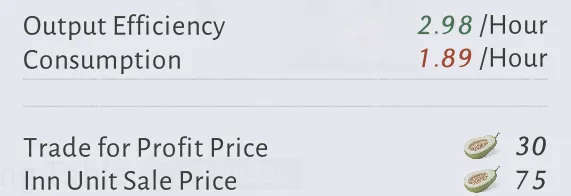
It is important to note that you should focus on cooking and selling the Weekly Best Seller dishes as they have an increased sales price. This might be different if you advance your homestead level a lot at the start because it will always pick a dish in your current highest available tier at the start of the week and it will stay until reset. So keep an eye on the Recommended Plans since they do update and will show you what to cook/sell for most profit.
Porcelain Kiln
The Porcelain Kiln is a facility building and is used to make all sorts of pots that are used for Brewery recipes or for the Trade for Profit. The level of the facility determines how many Kilns you can place and how many retainers you can send mining. It functions the same way as the Inn so focus on producing the Recommended Plans or whatever you need for the Trade for Profit.
Aromas Brewery
The Aromas Brewery is a facility building and is used to make drinks. These drinks can be used in the Inn to make gourds. The level of the facility determines how many Distilling Towers you can place and how many retainers you can send logging. It functions the same way as the Inn so focus on producing the Recommended Plans or whatever you need for the Trade for Profit.
Crane Retreat
The Crane Retreat is a facility building and is used to recover the stamina of your retainers. The level of the facility determines how many Resting Facilities you can place which determines how many retainers can rest at the same time. By resting your retainers at the Cranes Retreat they will recover +2.8/h vigor.
Local Specialties
Local Specialties include Fishing, Hunting, Mining & Logging. These professions are tied to a facility building and the amount of retainers you can send out to gather materials correlates with the level of the corresponding building. (e.g. Mining = Porcelain Kiln). The same basic rules
Some calculations regarding Prosperity and gourds.
The main way to get prosperity is by placing buildings inside your homestead or your Beyond Mundane. The game allocates a specific prosperity value to any building in the Homestead category of the building catalog. These values range from anywhere between 10 - 40 or in some cases more on the Industry buildings. Here is a breakdown of the Gourd to prosperity rates. (from Best (green) to worst (red))
As you can see the most cost efficient method will be to buy any 100 cost item and spam it in your Beyond Mundane for prosperity. Shop items have a weekly cap of 100 so try to buy out all the 100 cost items. 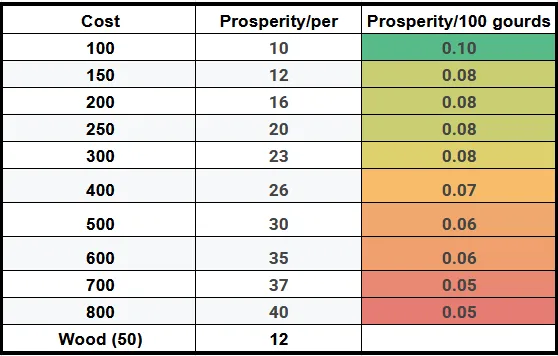
There is also the option to use wood for prosperity. This will always turn 50 wood into 12 prosperity. After a certain point in the progression you will always have the option to passively farm some wood and use it as an extra source of prosperity income. You can also deposit up to 2400 wood per week into your Warehouse.
Starting Tips
The whole system can be very daunting at first. The most important tip I can give is to read all the tutorial popups you get since they do give some important information. For some other tips:
- Keep an eye on the recommended plans since they update with your current level and give you an idea on what to focus on in your tier.
- Warehouse: Use the warehouse like an on demand feature. You can save a lot of time early by depositing items that you can buy from open world vendors instead of having your retainers slowly farm them.
- Trade for Profit: Try finishing this every week since its a big source of gourd income.
- Chapter goals: Especially at the start the chapter goals provide a great amount of gourds to give you a boost early on.
- Young Master’s Routine: Try to finish this every week since it gives you some Artisan’s Manuals, gourds and the chance to recruit a Confidants retainer.
- Important Shop items: Most of the shop items have a weekly stock. The most important item to buy are the Artisan’s Manuals since you can only get 35 of them and you need a lot to level the skills of your retainers. Once you hit higher levels and you need a lot of prosperity you should also try and buy out all the 100 cost furniture items since they have the best gourd/prosperity rate.
- Recruit Shen Yu early because it gives you Xiao Shi too